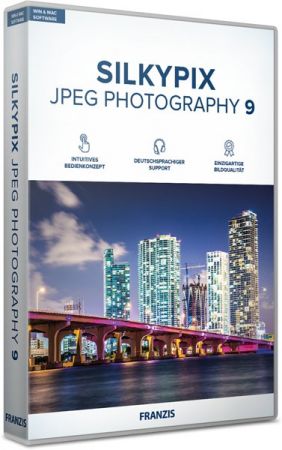
Windows x64 | File Size: 89.54 MB
"SILKYPIX JPEG Photography 9" is the best adjustment tool for finishing as a nice-looking photo for blogs and SNS, and printing and finishing uncompromised works.
In SILKYPIX JPEG Photography 9, "Auto Adjust" button which automatically performs correction suitable for the image, "individual adjustment of highlight/shadow" of the highlight part and shadow part of the photograph, "Dehaze" function and other features newly added, and making it more powerful photo adjustment software.
Although JPEG data uses 8 bit (256 gradations) gradation, it is automatically expanded to 16 bit (65,536 gradations) using SILKYPIX RAW Bridge. By treating JPEG data in a similar way to RAW data, high gradation rich image quality adjustment is possible.
SILKYPIX JPEG Photography includes "tastes", a kind of preset that incorporates useful styles and forms. Choose a taste such as "Landscape" or "Portrait" to make a finished photograph easily that fits your image. In addition, you can save all of your custom, adjusted parameters as a taste preset. Parameters are very useful functions, and you can easily recreate themes and styles across any number of photographs you take.
Remove unwanted objects using the Spotting Tool, such as dust that may appear due to contamination of your camera sensor. You can also adjust and apply rotation and cropping as you wish.
If you work with multiple images at the same time (such as images shot with continuous shooting), and adjust the taste and parameters, you can make corrections for all selected images at once. For example, even if you darken the exposure setting of the camera, if you select that picture and make correction, you can correct all the selected images at once.
SILKYPIX offers color management for monitor viewing or printing, including a "Printer proof" system that lets you simulate printed results from an ICC profile. These features support a process from accurate editing for printing.
We have newly added the "Auto Adjust" button which performs [Auto exposure bias], [Auto White Balance Setting], [Automatic level correction] suitable for each image at the same time. The "Auto Adjust" button is recommended for those who are "to start adjusting photos in the future" or "Photo editing has many adjustable items and do not know what to start from". Also, when adjusting a large amount of images at once, you can improve the efficiency of the adjustment work by utilizing the "Auto Adjust" button.
The "Highlight/Shadow" slider is mounted in the exposure adjustment item. This makes it possible to individually adjust the brightness of light and dark areas in the image. Even in scenes where subjects with dark contrasts are difficult to shoot or exposure scenes might be difficult to control, the brightness adjustment can still be fixed afterwards by individually using the "Highlight/Shadow" slider.
Add the "Dehaze" slider to the adjustment item for the mist removement of hazy images caused by atmospheric moisture or vapor.
"Curve / polygon area selection" has been added for selecting the correction area of the partial correction tool. "Curve / polygon area selection" can be set by clicking the area to be partially corrected in the image and connecting it by a curve or a straight line. That makes it very easy to select even a complicated area which used to be difficult before.
In addition, it is now possible to click "Select color to be corrected" that allows you to adjust only specific color gamut within the region as a correction target by selecting all correction regions including Circular/Gradual correction filter and brush. By utilizing "Select color to be corrected", it became possible to select more complicated correction area, and it was also possible to easily create monochrome photographs of only a partial color.
The "Blurred/Sharp periphery" function is added to the effect adjustment item. Using this tool, users are now able to blur the periphery of the specified range and apply sharpness. You can create a close-up effect by blurring the surroundings of the subject that is the main subject in "Blurred periphery". You can make a good correction using "Sharp periphery", etc. when shooting with the aperture stop value of the lens and the peripheral resolution drops.
DOWNLOAD
uploadgig
rapidgatorKod:https://uploadgig.com/file/download/b2cc7830524eFF69/NcLGAwA1__SILKYPIXJP92140E.rar
nitroflareKod:https://rapidgator.net/file/d9bf5f3dd78bea9b9e0cbb93f68e1165/NcLGAwA1__SILKYPIXJP92140E.rar
Kod:http://nitroflare.com/view/BCDF54D90832A4B/NcLGAwA1__SILKYPIXJP92140E.rar
1 sonuçtan 1 ile 1 arası
Threaded View
-
16.10.2019 #1
SILKYPIX JPEG Photography 9.2.14.0
Konu Bilgileri
Users Browsing this Thread
Şu an 1 kullanıcı var. (0 üye ve 1 konuk)


 LinkBack URL
 About LinkBacks


 Alıntı
Konuyu Favori Sayfanıza Ekleyin