
 LinkBack URL
 About LinkBacks
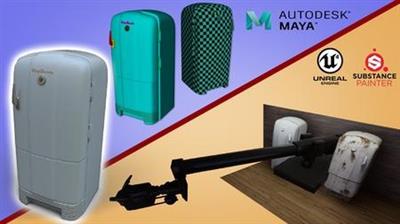
Vintage Fridge: 3D Modelling a game asset - Complete Course
Video: .mp4 (1280x720, 30 fps(r)) | Audio: aac, 48000 Hz, 2ch | Size: 7.2 GB
Genre: eLearning Video | Duration: 59 lectures (9 hour, 9 mins) | Language: English
Learn how to model, retopologise and texture a digital prop and present it within a scene
What you'll learn
Maya - 3D modelling
Maya - Retopology
Maya - UV unwrapping
Substance Painter - Texture Baking
Substance Painter - PBR texturing
Unreal Engine 4- Scene set up
Unreal Engine 4 - Presenting prop
Requirements
Basic knowledge of Maya's interface is recommended
Basic understanding for Substance Painter software is recommended
Description
'Vintage Fridge: 3D Modelling a game asset - Complete Course'
About
This Polygoods '3D modelling a game asset fridge' will help you improve your 3D modelling workflow by taking you through the entire pipeline of the modelling process for a vintage fridge prop. It will take you through various skills and new tools used within a current professional practice of Autodesk Maya modelling workflow in its current 2020 version. The purpose of these lessons is to teach you different techniques which you will then be able to incorporate onto your own personal workflow to increase your creative freedom in 3D modelling. It will also teach you everything that a modeller needs to know within Autodesk Maya so as to create a great 3D asset, that is perfect to be used as a video game model.
'Vintage Fridge: 3D Modelling a game asset - Complete Course' is set up with varying difficulties; helping you learn more advanced skills progressively. As we continue with the course, learning aspect and techniques will become harder, helping you to better ease into the modelling process.
The course will take you through a professional texturing pipeline of an industrial leading 3D digital painting software, Substance Painter. The course will take you through an entire workflow to paint an asset. The lessons will show you all the steps within texturing a PBR vintage prop starting from the fundamentals of software's setup and basics of creating a simple PBR material set up. The lessons will then take you through the steps of setting up the asset within Unreal Engine 4. It will teach you how you to easily import your 3D models and packed texture maps onto the scene
This course will cover a variety of skills found within a professional workflow of 3D modelling artists, including:
Within Autodesk Maya:
Retopology
This course will cover the fundamental basis of modelling retopology in addition to advanced techniques. We will go through the basics of how we utilise a high-poly mesh to set up an optimised low-poly version. You will also learn how to use 'quad draw' to manipulate and create new vertices so as to create a good topology for the mesh. We will go through various techniques that take advantage of other tools, such as 'snapping tool', to easily manipulate. Through this course, you will learn how to easily fill in the gaps of the optimised low topology. 'Vintage Fridge: Autodesk Maya Complete Modelling Course' will show you how to speed up our overall retopology process.
Symmetry
You will learn how to make best use out of symmetry tools to speed up your workflow. Combined with other tools, I will show you how to use the symmetry tool to become more efficient at the 3D modelling process. Your learning outcomes will include knowing how to use mirror-based symmetry and radial symmetry - allowing you to create more intricate shapes and edit these with ease.
Measurements
Through this course, you will learn how to set accurate measurement pointers for three-dimensional (3D) object regardless of its size. To achieve this, I will walk you through the tools provided in the base version of Autodesk Maya. Through learning to manipulate what is there already, we will be able to accurately scale the object. 'Vintage Fridge: Autodesk Maya Complete Modelling Course' will also teach you how to match an object to the set measurements to produce a model with perfect or realistic proportions.
Gizmo Manipulation
Throughout the course, we will learn what the best ways using gizmo manipulation are, and I will show you how to speed up the workflow. 'Vintage Fridge: Autodesk Maya Complete Modelling Course' will show you how to use gizmo manipulation together with different snapping options, such as snap to grid, and snap. This will allow us to make quick and accurate mesh adjustments. You will also learn how to position and orient gizmo tools to quickly and easily achieve the desired results of our creative workflow.
Transform Constraints
The course will cover ways of which we can restrain our transform tools in order to allow you to be more specific with mesh modifications. It will show you how we can easily use step snap tool within Maya to get the exact desirable rotation results within our workflow. It will also teach you how a transform movement constrain can be helpful to create perfect gaps within a pattern of a mesh.
Mesh attachment
Through 'Vintage Fridge: Autodesk Maya Complete Modelling Course', you will learn different methods of wielding objects together. You will learn how to use 'join mesh' alongside manually using the 'target weld' tool. We will go over the 'target wield' tool's practical uses in the vertex and edge edit mode. You will also be given examples of situations in which you can automate the process and weld based on vertex distance. Finally, we will cover how to use the Autodesk Maya 'bridge tool' to fill in a gap and keep the existing vertices in their order.
Boolean
Using Autodesk Maya's boolean operation, I will show you how you might negatively impact the mesh via a trial and error process. I will demonstrate how misusing the boolean operation can cause various unexpected errors, such creating n-gons that ruin the smooth subdivision of an object. 'Vintage Fridge: Autodesk Maya Complete Modelling Course' will show you how to use the boolean operation to get the desired results, in addition to how to fix your topology, in the event of an error, to keep a subdivision friendly shape.
Low-topology Optimisations
Within the course, we are going to go over ways to optimise our high-poly mesh version into a game-ready asset. We are going to learn of ways to reuse the existing topology and modify topology to lower the overall polycount. 'Vintage Fridge: Autodesk Maya Complete Modelling Course' will also show you which details to remove from your low-poly topology prop version to let you bake the normal texture map using a high-detail version mesh.
Quad draw
During the process of making a low poly game asset in Autodesk Maya, we will be covering the uses of the 'quad draw' tool. The 'Vintage Fridge: Autodesk Maya Complete Modelling Course' will (a) teach you the basics of the 'quad draw' tool, and (b) show you how to modify topology using this tool to create your own topology from scratch. Later, we are going to be moving onto some of the more advanced uses of the 'quad draw' tool and learn ways of using it in combination with other mesh editing techniques to learn more adaptable ways of workflow efficiency. This part of the 'Vintage Fridge: Autodesk Maya Complete Modelling Course' will give you greater control over the overall topology of your props.
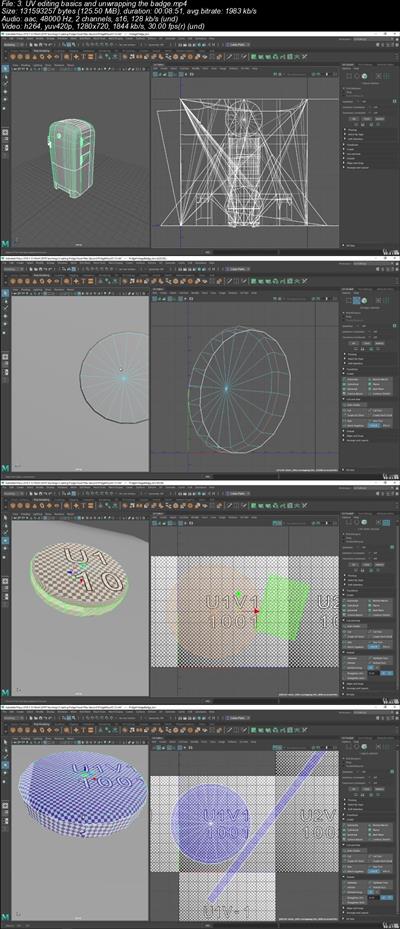
UV Unwrapping
The 'Vintage Fridge: Autodesk Maya Complete Modelling Course' includes an entire lesson on the UV unwrapping stage. We will go in-depth on how to easily split UV texture coordinates into multiple shells using manual and automatic ways of doing so. We will also be also covering ways to help you avoid distortions within a mesh's UVs. You will also learn the methods that professional artists use to fix distortions. The 'Vintage Fridge: Autodesk Maya Complete Modelling Course' will teach you ways to utilise UV shell layout within Autodesk Maya as well. It will cover all the information needed for you to make the best use out of an automatic layout tool and its menu. It will also cover manual methods, such as the 'pixel density scale' tool to help and give you a complete control over the resolution of individual sets of shells.
Mesh Editing with UVs
Sometimes adjusting the mesh models is inevitable. This 'Vintage Fridge: Autodesk Maya Complete Modelling Course' will go over techniques that can be used to edit the topology of a mesh without ruining the UV shell layout. You will learn how to add additional topology to increase texture density within a specific area of your mesh. We will also be learning ways to fix the topology of an edge-flow to get a low-poly version which would be more suitable for your model's texturing stages.
Mesh Cage
Through this 'Vintage Fridge: Autodesk Maya Complete Modelling Course', you will pick up skills for creating a cage asset for a 3D mesh within Autodesk Maya. Cages are used in professional 3D texturing practices because they allow artists to manage their texture bake outcomes. The cage controls the way rays hit the mesh to bake the detail from a high-poly version of a mesh onto a low-poly version. By the end of this course, you will be able to create a cage with ease for any mesh in all your future projects.
Colour ID Mesh
The course will show you all the basics for setting up a high-poly version of a mesh for ID texture map baking. The 'Vintage Fridge: Autodesk Maya Complete Modelling Course' will teach you ways of colouring our objects, including how to colour individual mesh pieces. It will teach you how to efficiently apply colour variation. Finally, enrolling in this course will enlighten you to the tips and tricks of how to categorise the mesh by showing you where the variation should and where it should not be.
Within Substance painter:
Workspace and its set up
In this course, we are going to go over a foundation of Substance Painter set up in order to help us work throughout the course in an orderly manner. Throughout the lessons, you will be taught in ways for which you can take full advantage of a Substance Painter's space and all of its tools. Learn how to use layers to their full extent in order to get the best results out of your textures.
Display Adjustments
The course includes all the necessary information to build up a good foundation of great Substance Painter previews of an asset to help you better visualise the overall atmospheric look. It will cover ways of which we can easily change and adjust the environmental maps to get indirect lighting fitting the overall theme of an object.
Baking Textures
The lessons include all the necessary information you need to know in order to bake great texture maps. It includes normal map texture baking using a cage to avoid high poly mesh being baked onto low poly without any abnormalities such as warping or texture artifacts. You will also learn how to set up and use the Colour ID map within a professional pipeline to allow you to make quick material differentiation of the prop.
Design Custom Materials
This tutorial will show you how you can create your very own PBR textures within Substance painter. You will learn how to make a realistic looking materials such as creating high definition metal that can be applied and adjusted within any part of a prop accordingly. You are also going to learn how to create custom rust texture and how to make variations of it in accordance to the material it is being applied to. The course will teach you the difference between rusted material on a metal and the rust on a painted surface and will show you how you can make it yourself throughout the following substance painter online lessons.
Fixing Texture seams
The course will provide you with detailed information on how you can make best use out of texture projections within texture maps and layer masks to automatically hide the UV seams. Learn how to manually fix texture maps errors by stamping out the mismatches using Substance Painter built in texturing tools.
Create ageing to your material
Design your very own custom materials with story behind it behind it. Learn how to make creative artistic choices within the texturing process of the prop in order to tell a story an object through the visual look. The course will teach you how you can make use out of a backstory of an object in order to make texture adjustments and give your prop more visual depth to it.
Within Unreal Engine 4:
Asset set up
Learn how you can create and set up
creating a project using the new unreal engine 4.24 process . Importing a personal asset with unique scale factor amongst other things which are adjusted through the Unreal Engine's Import menu. During the course, you will cover how to create and apply your very own custom master material for a fully optimised packed texture set then reapply using other textures and make it reusable by turning it into an instance.
Level build
Learn how to Build a simplistic level using unreal engine provided tool for creating geometry.
Set up free Unreal Engine marketplace PBR textures by going through the steps of how to make use out of Epic games always growing premium assets which are given away for free to anyone to using company's game engine. Apply the textures and learn how to adjust them within the level to make quick overall changes for the texture's patterns.
Camera work
Learn how to set up professional cinematic camera onto the scene and how to use it to present the asset. Animate the created camera by making use out of a commonly used cinematic shot within the filmmaking and video production industries, crane shot. Learn the basics of a sequencer within the unreal engine 4 and create a tracking crane shot animation with a seamless loop.
Post processing
Learn how to make your very own, custom vintage view for the camera. This course will teach you how to manually set up a shot of a scene to give it a nostalgic vintage visual look to it. Create your own atmosphere using visual adjustments such as tone and contrast adjustments, as well give your prop more depth to the detail by increasing the ambient occlusion strength.
Who this course is for:
3D artists interested in creating and presenting a physically based rendered (PBR) asset
Computer game designers
Aspiring prop artists
Download link:Kod:rapidgator_net: https://rapidgator.net/file/6bd287c4d51bf26d73620f070be3799a/z8vj2.Vintage.Fridge.3D.Modelling.a.game.asset..Complete.Course.part1.rar.html https://rapidgator.net/file/25e5d61f28a9eabaf09230da3a0ccf74/z8vj2.Vintage.Fridge.3D.Modelling.a.game.asset..Complete.Course.part2.rar.html https://rapidgator.net/file/e6349f13a64d5f4214693346d4862b67/z8vj2.Vintage.Fridge.3D.Modelling.a.game.asset..Complete.Course.part3.rar.html https://rapidgator.net/file/6522345f83f6f2b91bdbf6350412acf7/z8vj2.Vintage.Fridge.3D.Modelling.a.game.asset..Complete.Course.part4.rar.html nitroflare_com: https://nitroflare.com/view/5F1D93592873B1E/z8vj2.Vintage.Fridge.3D.Modelling.a.game.asset..Complete.Course.part1.rar https://nitroflare.com/view/FD5F808343EC9EF/z8vj2.Vintage.Fridge.3D.Modelling.a.game.asset..Complete.Course.part2.rar https://nitroflare.com/view/6434302A15CF386/z8vj2.Vintage.Fridge.3D.Modelling.a.game.asset..Complete.Course.part3.rar https://nitroflare.com/view/A502C4DA6CCE202/z8vj2.Vintage.Fridge.3D.Modelling.a.game.asset..Complete.Course.part4.rarLinks are Interchangeable - No Password - Single Extraction

1 sonuçtan 1 ile 1 arası
-
09.05.2020 #1Üye


")
- Üyelik tarihi
- 20.08.2016
- Mesajlar
- 147.735
- Konular
- 0
- Bölümü
- Bilgisayar
- Cinsiyet
- Kadın
- Tecrübe Puanı
- 157
Vintage Fridge 3D Modelling a game asset - Complete Course


 Alıntı
Konu Bilgileri
Users Browsing this Thread
Şu an 1 kullanıcı var. (0 üye ve 1 konuk)

Konuyu Favori Sayfanıza Ekleyin